John got me a cheesemaking kit for Christmas, and we finally decided that the time was right to make us some CHEEEEESE! Fresh Mozzarella to be exact. All we had to get was a gallon of (non-ULTRApasteurized) whole milk – the rest of the ingredients were in the kit – rennet, cheese salt (non-iodized), citric acid, and a thermometer.
Below are photos and general descriptions of the process – this is not detailed with exact measurements and not a full recipe by any means, so if you want to make your own cheese, follow the link above or google it – lots of great info online! Onward…..
First, we dissolved a 1/4 tablet of rennet into a little water and set that aside. Then we dissolved teaspoons of citric acid in water and poured that in a large pot, and added the entire gallon of milk – heating it til about 90 degrees. It didn’t really take that long.
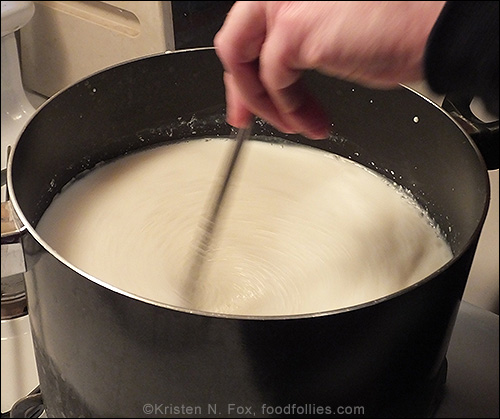
Then we removed the pot from the burner and slowly stirred in the rennet solution we made earlier for about 30 seconds. They make sure to specify stirring up and down, not just spinning it around.
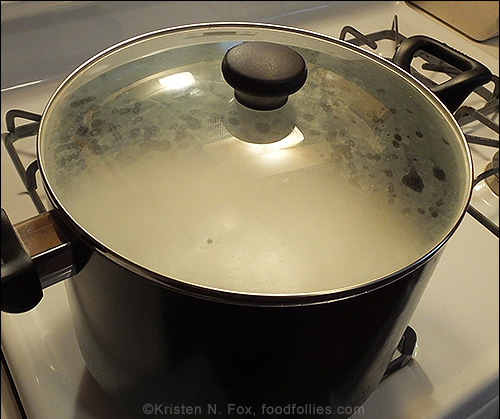
Next, we took it off the warm burner and let it sit for about 5 minutes with the lid on. This is the part where the whey separates out and the curd beneath starts to get the consistency of custard. Ours actually took a bit longer than 5 minutes – maybe an extra 5 tops.
In the image below you can see the custardy curd part is easily pulled away from the side of the pot. It was a lot softer than we were expecting (since we had ‘finished cheese’ on the brain) but it was just perfect at this point.
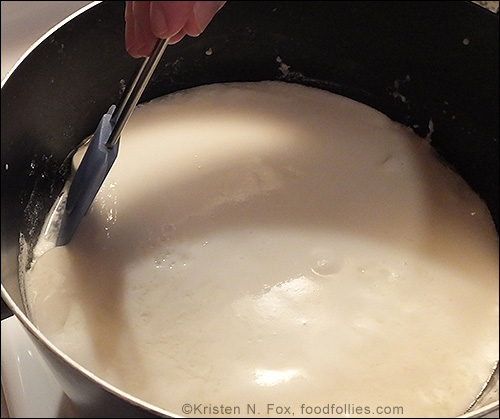
Next, we took a knife and cut the curd in a grid pattern – feels like you’re cutting nothing, but it’s really working – LOL. I shook the pot slightly and could see that the cut marks were staying, not healing back up. Whew!
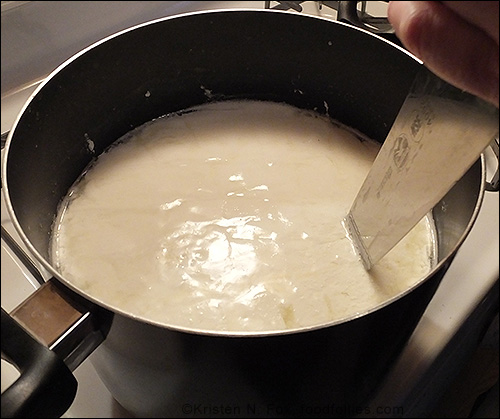
Gotta heat it up again, to 105, while slowly moving the curds around – not really ‘stirring’. Then, we took it off the heat and kept stirring for a few more minutes. In the photo, you can see the yellowy, watery whey, and the chunks of curd much better now.
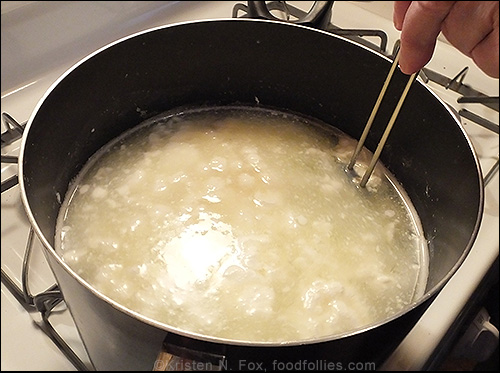
Then, we scooped out the chunks of whey with a slotted spoon. After a while John suggested we use the strainer, which did save us a lot of time, although it was fun, for a while, to stir the goop and find new curds that had sunk to the bottom of the pot. Here are the curds in a glass bowl, with some whey settled around it.

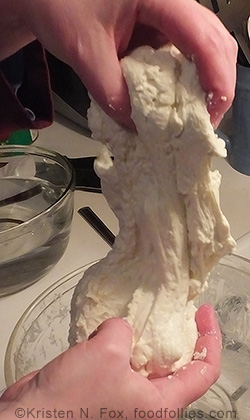
At this point we used the microwave method of heating the curds, then draining off the excess whey, then adding a little salt, and massaging it into a ball-ish form, heating it again, and then stretching it like taffy, until it was smooth and shiny. (The more you stretch/work it the firmer it will be.)
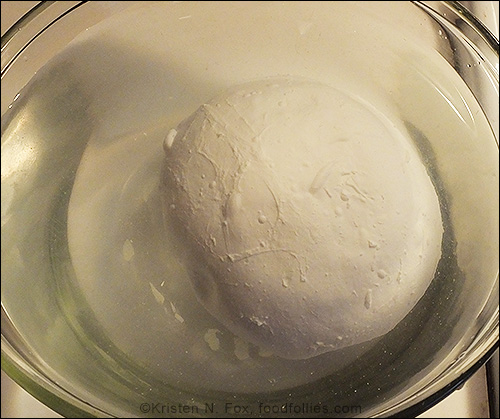
After stretching, we formed it into a ball and cooled it in cold water. After five minutes, we added ice and let it set for 15 more minutes.
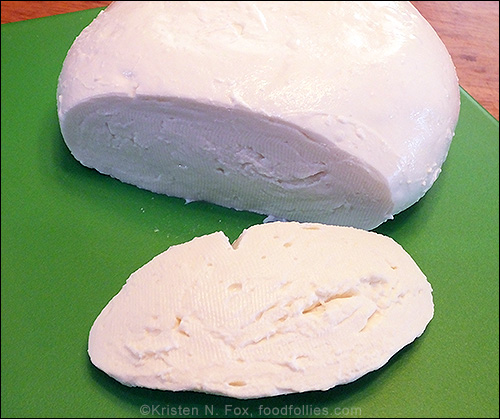
Then, as we could barely contain ourselves, we rescued it from the cold bath, patted it dry with paper towels, and cut off a chunk to eat – ohhhh – it was soooo good! Creamy, a wonderful flavor and consistency. And although it seemed like there were a lot of steps, it only took us about 45 minutes to make it – not bad for cheesemaking newbies!
I highly recommend the Cheesemaking Kit from Cheesemaking.com – and they have a number of other kits and supplies and books too. The directions were easy to follow, and the cheese was delicious! 🙂
