Awesome Waffles

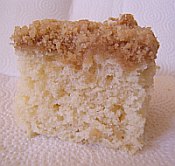
Kristen got me a waffle iron two Christmas’s ago, and in all that time I’ve been looking for a really good basic waffle recipe.

The first ones I tried were the easy pancake mix variety, which tasted exactly like pancakes, not bad, but not waffles. Next, I tried the more complicated recipes that came with the waffle iron. One of them included lemon juice which I thought was an odd choice, but the waffles were pretty good. Still, it wasn’t the sort of recipe that makes you want to go through all the effort.

Finally, we found a recipe on Myra Fitch’s homepage. She said it was her favorite recipe which actually came with her waffle maker years ago. It was by far the best waffles we’ve tasted, they were light and flaky with that perfect waffle flavor.

Homemade Waffle Recipe

1 3/4 cup flour
2 teaspoons baking powder
1/2 teaspoon salt
1 tablespoon sugar
3 eggs
7 tablespoons vegetable oil
1 1/2 cups milk

Preheat the waffle iron. Sift the dry indredients into a medium sized bowl. Separate the eggs, putting the egg whites in smaller bowl. Beat the egg whites until they are stiff. (If you are using an electric mixer, you can beat the egg whites first, then beat the batter without having to wash the beaters. The reverse is not true. If you beat the batter first and you have to wash the beaters before beating the egg whites.) Add the egg yolks, oil and milk all at one time to the dry indredients. Beat until there are no lumps in the batter. Fold the egg whites into the other batter using a spatula or other flat utinsel. Put a full 1/2 cup of batter in your waffle iron to make a 9-inch round waffle. This recipe makes about eight 9 inch waffles.

If this recipe makes too many waffles for one setting, try freezing the waffles you do not eat. After the waffles have been cooked in the waffle iron, put them out on a cooling rack. When they are cool, place them in a plastic bag, taking out as much air from the bag as possible. Then freeze the bag of waffles. The next time you want a quick waffle, microwave one from the freezer for about 45 to 60 seconds. They are almost as good as fresh waffles.

Note from John: I realize the seperating and folding of the egg whites sounds like a lot of extra work, but it’s definitely worth the effort. This step has been in all the better waffle recipes I’ve tried and it seems to be one of the key differences between waffles that taste like waffles and waffles that taste like “square pancakes.”

Sour Cream Streusel Coffee Cake

Sour Cream Streusel Coffee CakeI had the urge to bake something the other day, and a recipe on the back of the Biscuit & Baking Mix (Bisquick, or store brand) seemed like it would be quick and painless, and would result in cake, which was the whole point, of course. I tweaked it a bit here and there.

John took one bite and his eyes lit up, “This tastes just like Drakes Coffee Cakes!” If you’re a fan of Seinfeld, you know that there is NO higher praise for a coffee cake. Even Entennmann’s brand, despite the fact that they have a display at the end of the isle. *grin*

Sour Cream Streusel Coffee Cake

Cake:
1 1/2 cups Biscuit & Baking Mix (Bisquick, or Generic)
1/2 cup sugar
1 egg
3/4 cup sour cream
1/2 teaspoon vanilla

Topping:
1/2 cup packed golden brown sugar
1/2 cup all purpose flour
3 tablespoons butter, softened
2 teaspoons vanilla extract
just a bit of powdered sugar for sprinkling

Preheat oven to 350 degrees. For the cake, stir all of the ingredients together in a large mixing bowl until thoroughly mixed. Spread batter into a greased 8-inch square pan. For the topping, mix all topping ingredients together in a medium-sized bowl, until crumbly. Sprinkle topping over the top of the cake batter.

Bake for 30 minutes or until a toothpick inserted into the center of the cake comes out clean.

Once the cake has cooled, powder the top of the cake with the powdered sugar so it makes a nice contrast with the brown sugar topping.

Calzones


Kristen made Calzones the other night, not the sad combinations of salted meats and cheap cheeses that they call calzones here in California, but real New York food, stuffed to the breaking point with whole milk Ricotta and Mozzarella cheeses. They’re rich, creamy and insanely delicious, especiall with a sprinkle of Oregano in the filling to give it just a little spice.

And the recipe…

Calzones

The dough will make two large calzones.

1 package yeast
1 TBSP sugar
1 TBSP oil
1 tsp salt
2 3/4 cups flour
1 tub (small) whole milk ricotta cheese
12 or 16 oz. chunk of whole milk motzarella cheese

Dough:
1) Dissolve 1 pk yeast in 1 cup warm water.
2) Mix 1 TBSP sugar, 2 TBSP oil, 1 tsp salt, 2 3/4 c flour to yeast and water.
3) Mix together till smooth. Knead and cover with towel for 30 minutes.

Roll out dough approx. 10″ circle if you’re making them by hand. (Or large enough to cover the open surface of a calzone maker/mold.) Put appoximately 1 to 1 1/2 cups whole milk ricotta cheese in the center of the dough. Place 1/2 to 1 cup of grated whole milk mozzarella cheese on top of the ricotta cheese. Fold over and crimp shut.

Place on greased cookie sheet. Brush with melted butter (after 15 minutes of cooking). Cook for a total of 25 minutes at 375 degrees or until golden brown.

You can add many kinds of ingredients if you want to go beyond the basic, but delicious, cheese calzone. Pepperoni or cooked italian or pan sausage make a nice addition, for instance, as well as sauteed onions and peppers – if you add ingredients, reduce the amount of cheese in proportion so the calzones don’t get overstuffed and pop open during baking.

You can also use the dough recipe here to make an excellent pizza crust.

Pierogies

I was inspired to make homemade pierogies yesterday and enlisted John as the filling-maker, while I played with the dough. We’d never made them before so we browsed through John’s “New York Cookbook” which had a couple of recipes. We took ideas from each of them, depending on what ingredients we had on hand.

For the filling, John boiled a few peeled and chunked potatoes (too many, as we ended up with a lot of extra filling – two would have probably been enough), mashed the potatoes, and then added finely chopped and then blanched onion and garlic, and some fresh ground black pepper and salt. The dough was pretty basic – a bunch of flour, some milk, a bit of oil, salt, and three eggs. It came out quite soft and elastic, like pizza dough. I actually had to add a bit more flour to stiffen it beyond the ‘really thick batter’ phase. I rolled out the dough to about 1/8″ thick and then made cutouts with a biscuit cutter. We then filled the cutouts of round dough with the filling and a bit of finely shredded extra sharp cheese, folded them over and pinched them shut, and then boiled them up. When they were done, we sprinkled more cheese on top. (We considered lightly frying them to crisp them up afterwards, but were too hungry for yet another step.)


If this is any kind of testimonial, they tasted almost EXACTLY like the Mrs. T’s Pierogies you can get in the freezer section at your local grocery store, only better, so we must have done something ‘right’ – LOL.

Pierogies

Dough:
3 eggs, beaten slightly
1/2 cup milk
1/4 cup vegetable oil
1/8 teaspoon salt
2 1/4 cups flour

Mix these dumpling ingredients together to make the dough. Then, knead the dough until you reach a pizza dough-like consistency, then form into a ball. Let sit for an hour, then refrigerate for about a half-hour, covered.

Filling:
Approximately two medium sized potatoes (or one rather large, or the equivalent)
1/4 finely chopped yellow onion
2 cloves minced garlic
black pepper and salt to taste
some finely shredded extra sharp cheddar cheese – approx. 1/4 cup

Peel, cube and boil the potatoes until soft. While the potatoes are cooking, chop the onion and blanch until clear. Then add the minced garlic and continue to blanch until blended. Set aside.

Mash the potatoes in the saucepan with a manual masher. Add onion and garlic to the potatoes and then mix until well blended. Add salt and black pepper to taste.

Roll out the dumpling dough to about 1/8″ thickness. Cut into rounds (such as with a biscuit cutter) that are about 2 1/2 inches in diameter. Place about a half teaspoon (depending on the size of the cutout) of filling on the circle of dough. Sprinkle a bit of the shredded cheese on the filling. Fold the dough in half and pinch the edges shut firmly with your fingertips. Continue until all dough is gone.

Bring a good amount of water in a large saucepan to a boil. Reduce heat to a simmer. Add about 10-15 dumplings at a time (not too crowded) – they will sink at first and then float as they cook further. They will take about 8 minutes, or longer if you made the dough thicker than recommended. When done, pull them from the water with a slotted spoon. Continue with this process until all the dumplings are cooked, keeping the cooked ones warm in the meantime.

For serving, sprinkle more grated extra sharp cheese on top. Another option is to fry the cooked pierogies in a frying pan with a bit of oil/butter in the bottom, until somewhat brown and crispy.

Note: These are best when eaten promptly. The garlic flavors will fade overnight – I guess it’s a garlic and potato thing? Anyway, they’ll still taste good a day later, but not as garlicky.

Chicken Cordon Bleu

Tonight we made Chicken Cordon Bleu one of my favorite dishes.

It’s also one I have seen maligned in sad and evil ways:

The most evil by far was done by a fellow cook I worked with who believed he was “God’s gift to cooking.” He dredged the unflattened chicken breasts in flour, added the ham and cheese, rolled it up and dropped it in the deep fryer to seal it in. Those of you who are familiar with restaurant deep fryers know how long that would take to cook the chicken thoroughly. (I didn’t try it, so I don’t know if it was fully cooked.)

As if to add insult to injury, he then made a cream sauce and poured it into the serving pan over the greasy chicken. The final result crusty brown chicken breast peeking out from a two inch lake of yellowish cream sauce, with pools of grease reflecting the flourescent lights from the cafeteria ceiling above. (shudder)

The second, less deadly but terribly disappointing entry was the Chicken Cordon Bleu sandwich from Jack in the Box. For starters, it was done on plain grilled chicken, which was dry and tough. The “we don’t make it until you order it rule” (which means assemble it, not cook) left the overcooked warm chicken breast unable to melt the swiss cheese on the sandwhich. Finally, the supposed “creamy garlic parmesian” sauce tasted a lot like Ranch dressing to me.

The most acceptable food item using the name Chicken Cordon Bleu is the institutional pre-frozen type with processed chicken. They’re not great, but at least they’re tasty.

Homemade Chicken Cordon Bleu on the other hand is not that hard to make and is delicious! I made a slight error this time around, I breaded the chicken prior to rolling it up. This led to some excess cheese leakage from the the chicken, but the final result was still excellent!

Chicken Cordon Bleu

6 boneless, skinless chicken breasts
deli ham
deli sliced swiss cheese (and/or monterey jack cheese)
butter
2 eggs
seasoned bread crumbs
(white rice and a cooked vegetable as side dishes)

Pound the chicken breasts flat (to about a half inch thick). Then layer the ham on top of the chicken, then the cheese, then about a tablespoon pat of butter.

Wrap the chicken breast plus ingredients up into a roll and skewer twice at different angles to prevent unraveling. Trim any excess skewer so that the piece is manageable. Break 2 eggs in a bowl, but don’t blend, just lightly break yolks. Fill another bowl with seasoned bread crumbs. Dip chicken roll in egg – make sure it’s entirely coated. Then, roll the chicken around in the bread crumbs until entirely covered.

Bake in a 350 degree oven for about 45-50 minutes or until golden brown and center is at 150 degrees (and not pink). Serve with skewers in, but REMOVE SKEWERS BEFORE EATING. Rice and a vegetable round out this meal nicely.

Revenge is a Dish Best Served with Cheese

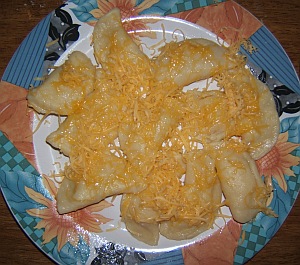
Revenge is the name we have given our version of Loaded Nachos. Why Revenge? Many moons ago Kristen’s sister made us a recipe called Southwest Fiesta, lots of it. By the 3rd or 4th day of leftovers we started calling it “Fiesta, The Revenge” like it was a movie sequel. From there it just became Revenge, and even though we changed many of the ingredients the name just stuck.

This is one of those recipes you can’t do wrong. You can vary any of the ingredients to suit your own tastes but this is our favorite.

Revenge (or Loaded Nachos) Recipe

1lb lean ground beef
1lb monterey jack cheese
1lb extra sharp cheddar cheese
1 can black kidney beans
1 can corn niblets
1 can diced tomatoes
1 jar salsa
1 medium onion
A smidgeon of vegetable oil
salt
pepper
chili powder
Large bag of sturdy tortilla chips
Sour cream

Dice up the onion. Add the smidgeon of oil to a large frying pan and heat under a medum flame. Add the onion and saute for several minutes until soft and translucent.

Add ground beef to pan, chopping into smaller chunks with the spatula and stirring as it cooks. Cook until done, when no ‘pink’ remains. Drain the excess fat if necessary.

Open beans and rinse away icky bean juice, add to meat. Open and drain corn niblets, add them as well. Add diced tomatoes, then add salsa, salt, pepper and chili powder to taste. (You can also add more spice with things like Cayenne pepper, hot sauce, etc.) Let the whole meat mixture cook together for a little while. (If it’s a little liquidy, this will reduce the amount of moisture.)

Shred cheeses onto a plate and mix together lightly.

Line a large, microwave safe plate with a layer of chips. Use a slotted spoon to sprinkle some of the mixture on top of the chips (don’t overload too much!), then sprinkle a good amount of cheese on top. Microwave for about 1 minute until the cheese is melted. Add sour cream liberally to chips as desired.

Beef Lime Wraps


It began as an attempt at crossing Fajitas and Enchiladas, an idea which I will pursue some distant day. (Looks wistfully away from the monitor for a moment).

Somewhere along the way, the green peppers I intended to buy vanished. I’m not sure where or when this happened, but they never made it into my car. Next, one of the onions I bought turned out to be bad, really bad. This left me with one onion and two jalapenos, a bulb of garlic, and some boneless beef short ribs I got on sale.

Searching through the kitchen, I began to assemble some of the more interesting flavoring items. I noticed the lime juice in the back of the refrigerator, and was inspired.

I diced up the onion and jalapenos (removing the seeds) and cut the meat into bite sized pieces. The meat far outweighed the veggies, so the fajita angle was completely out. I sauteed the veggies, added the meat, lime juice and some rice wine vinegar. The mixture seemed a bit dry, and I didn’t want the meat to get tough, so I opted for some water and a little flour to make a more gravy like creation. I let it cook for a while and gave it a taste.

It wasn’t bad, but it wasn’t great either. It needed a lot more zing. I added the rest of the lime juice, some spices and a packet of beef boullion (No MSG of course). I let it cook a bit longer to blend in the new flavorings, and voila! I had… something.

The final result was very tasty. We decided to try it as a wrap with cheese and sour cream (delicious) but it would have gone very well over noodles too.

The official name is Beef Lime Wraps which is perhaps the most accurate, but I’d like to start giving my creations more imagnative names, like “Poochy”, only not so lame.  Here is the recipe…

Beef Lime Wraps

1 Medium Onion
2 Jalapeno Peppers
1 Clove Garlic
2lbs Boneless Short Ribs (This is what I used, but other cuts of steak would work as well)
6oz Lime Juice
1/4 Cup Rice Wine Vinegar
1 Cup Water
1/3 Cup Flour
1/2 tsp Cumin
1 tsp Chili Powder
1 Packet Beef Boullion
1 Salt to taste
6 Medium Flour Tortillas
10 oz Shredded Monterey Jack Cheese
1/4 cup vegetable oil
Sour Cream (optional)

Cut the steak into bite sized pieces, trim away any excess fat.

Mince garlic and put aside.

Finely dice the onion and peppers(remove the seeds) Put the oil in a large saucepan and heat for several minutes. Add onion and peppers, saute’ for 5 minutes then add the garlic and continue to saute for 3 more minutes.

Add beef, lime juice, rice wine vinegar and water to the pan.

Next add flour, cumin, chili powder, beef boullion and salt. Allow mixture to cook for 20 minutes, stirring occasionally.

Once mixture is ready, spoon into tortillas and roll like an enchilada. Top with shredded cheese and microwave for a minute or so to melt the cheese, top with sour cream and enjoy!