Quiche Florentine

John made a fantastically delicious Quiche Florentine the other day – it’s lucky I took a photo before we started eating it because it didn’t last long!

quiche florentine

He made a homemade crust, and then, to the best of his recollection, the quiche was a mixture of 5 or 6 eggs, a carmelized onion, chopped spinach, sharp and monterey jack cheese, tiny chopped pieces of about half of a small ham steak, parsley, a bit of milk, and maybe a little pepper. Sorry we can’t give any specific measurements, but he just eyeballed most of it when he was putting it all together. He does remember baking it for 45 minutes at 350 though -LOL! (Toothpick method for determining doneness works well since mostly you have to make sure the eggs are set.)

[Tags: , , , , ]

Apple Streusel Muffins

It’s funny the way the mind works. This morning before breakfast I thought about the nice bag of MacIntosh apples that we’d bought a day or so ago, then remembered that we still had two Granny Smith apples in the fridge from even earlier, at which point my brain just interrupted itself to yell “Apple Streusel Muffins!” So, not wanting to cause any internal conflicts so early in the day by struggling with that thought, I found a recipe online and dashed to the kitchen.

I made some adjustments to the original recipe which I think worked out well – here’s the final Apple Streusel Muffins recipe (below) that I worked from. Came out looking and tasting delicious, if I do say so myself. Of course, the other samplers I had on hand also seemed to like them, so there’s more than just my opinion, if you were worried – LOL.

apple streusel muffins

Apple Streusel Muffins

2 cups flour
2 teaspoons cinnamon
1/4 teaspoon nutmeg
1 teaspoon baking powder
1/2 teaspoon baking soda
1/2 teaspoon salt
1/2 cup butter, softened
1/2 cup white sugar
1/2 cup brown sugar
2 eggs
1 1/4 teaspoons vanilla extract
1 1/2 cups chopped apples
1 1/2 cups shredded apples

Topping:
1/3 cup brown sugar
1 tablespoon flour
1/8 teaspoon cinnamon
1 tablespoon butter, softened

In mixing bowl, mix flour, cinnamon, nutmeg, baking powder, baking soda, and salt, and set aside.

In large mixing bowl mix butter and sugars until creamy. Add eggs and mix. Mix in shredded and chopped apples and vanilla. Gradually stir in flour mixture until well mixed. Batter will be thick.

To mix topping, combine brown sugar, flour, cinnamon, and butter in a small bowl and mix with a fork to get smallish crumbly chunks.

Grease regular-sized muffin tins (or use paper liners) and fill each space with muffin batter. Then, sprinkle about a half teaspoon of streusel topping on each muffin.

Bake at 375F for 20 minutes or until a toothpick inserted into the muffin comes out clean. Makes about 16 muffins.

Adjustments on Half-Moon Cookie Recipe

In the New York City area they are called Black & Whites and have chocolate and vanilla icing on them, but in upstate New York, where I am from, they are called Half Moon Cookies and have more of a traditional frosting than a hard icing.

Anyway, I’ve adjusted the recipe we have on our site, which originally came from the New York CookBook. Basically, the changes are… instead of 2.5 cups of cake flour and 2.5 cups of all purpose flour, I found that 4 cups of cake flour and 1 cup of all purpose flour make for a much lighter cookie, but still with excellent consistency. They were just too dense and heavy before with so much of the regular flour.

Also, instead of the 20-30 minutes of cooking time, I suggest 12-15 minutes MAX. I don’t even know where they got 20-30 minutes – if I left them in that long at the suggested temperature they’d be dark and crispy, and not in a good way. 12 minutes at 375 in our oven works just fine.

Here’s the recipe:

Half Moon Cookies

1 3/4 cups granulated sugar
1 cup (2 sticks) unsalted butter, softened
4 large eggs
1 cup milk
1/2 teaspoon vanilla extract
1/4 teaspoon lemon extract
4 cups cake flour
1 cup all purpose flour
1 teaspoon baking powder
1/2 teaspoon salt

Preheat oven to 375. Butter two baking sheets and set aside.

In a large mixing bowl, combine the sugar and butter and mix by machine or hand until fluffy. Add the eggs, milk, and vanilla and lemon extracts and mix until smooth.

In a medium bowl, combine the flours, baking powder and salt and stir until mixed. Add the dry ingredients to the wet in batches, stirring well to combine. Using a soup spoon, drop spoonfuls of the dough 2 inches apart on the prepared baking sheets. Bake until the edges begin to brown, 12 to 15 minutes. Allow to cool completely.

Note: Frost flat side of cookie, half in chocolate, half in vanilla – can use your favorite frosting recipes, although some prefer more of a glaze or icing than a frosting.

Oh, and that photo of the Half Moon Cookies up there is an older photo. I did make a successful batch a day ago, but just as I was mixing all the dry ingredients we lost power for a few hours. It was after 8 p.m. when we got power back, and by the time the cookies were mixed and baked and ready for frosting I was really tired so I only did chocolate frosting on them – LOL – making them, effectively, just new moon cookies, I suppose. So that’s why I didn’t take new photos – but they came out just perfect with the recipe adjustments – deliciousness!

Chocolate Ganache – Easier Than I Thought

A while ago, I had an impulse to try making chocolate ganache. For a long time I’d thought ganache to be this tremendously tricky thing (probably because the word ‘ganache’ SOUNDS complicated, although apparently it comes from the French word ‘jowl’, which makes sense, but suddenly makes it seem NOT so exotic anymore – heh), but when I found a recipe, I was pleasantly surprised and thought, “Hey, even *I* could make this!”

I used the chocolate ganache recipe from allrecipes.com (minus the rum – that just leaves heavy cream and chocolate chips), and poured the finished product over a single layer of a chocolate mayonnaise cake that I had made earlier just for this experiment.

It is recommended pouring the ganache on top of the cake when the cake’s on a baking rack so it doesn’t pool and the sides look smooth, but I did it right on the plate because I didn’t feel like messing with the rack, but in the future, I’d recommend the rack method. (You can see a bit of the pooling in the image above.)

Anyway, it came out nicely, I think. Next time, however, I’m going to add a touch more chocolate than is recommended and wait a tad longer for the ganache to cool, as it was a little thin when I poured it on the cake.

Also, if you whip the ganache in a mixer for about 5 minutes I hear you’ll get fantastic frosting, although I haven’t tried this myself yet.

[Tags: , , , , ]

Homemade Chocolate Ice Cream

John did a wonderful and horrible thing over the holidays – he gave me an ice cream maker! *grin*

The ice cream maker is a Donvier (made in Canada), and has a metal cylinder you freeze in the freezer (no rock salt required) and has a manual handle to churn the ice cream, which is very satisfying, and easy to do while watching tv or reading food blogs.

Since we’ve acquired this magical piece of kitchen equipment, we’ve been doing a lot of experimentation, and I’m finally getting around to posting about it – sorry it took so long – ice cream coma!

We’ve learned that we definitely prefer the ice cream that’s made with the cooked custard-like base with eggs, as opposed to the non-egg recipe that’s also not cooked. The custard-base ice cream turns out SO smooth and creamy, and while the non-cooked, non-egg one is also very good, it’s a little more ‘ice crystally’ and not as smooth and creamy – your mileage may vary.

The first cooked ice cream that we made was based on a basic ice cream recipe we found on the internet and adjusted to our own taste – see below.

For this batch, though, we went overboard, and instead of JUST adding cocoa, we also added 3 ounces of finely chopped dark chocolate, which melted into the custard base before it cooled. The ice cream was ALMOST (I said ALMOST), if there is such a thing, TOO chocolatey, but was magnificent and decadent!

Needless to say, it didn’t last very long.

Stay tuned for more ice cream experimentation results, including frozen yogurt, and what to do with leftover fudge (wild guess?).

Homemade Ice Cream

Basic recipe is for vanilla, with chocolate additions added optionally.

3/4 cup sugar
1 cup milk
1/4 tsp. salt
3 egg yolks, lightly beaten
2 cups heavy cream
1 tsp. vanilla extract
ice cream maker

If making chocolate, also
1/3 cup cocoa

Place egg yolks in a small bowl and set aside.

Combine sugar, milk, and salt (and 1/3 cup cocoa if making chocolate) in a saucepan over low to medium heat, stirring constantly. Bring to a simmer.

Pour 1/3 of this mixture into the egg bowl and stir, then pour the egg mixture back into the saucepan. Heat until thickened, but do not boil, and stir constantly. When done, mixture will cover the spoon/spatula thickly (instead of being too liquidy and not sticking to the spoon at all.)

Remove from the heat. (To make extra decadent chocolate, you can add 2 ounces of chopped semisweet chocolate chips at this point – stir until melted.) Pour into a bowl and refrigerate for about two hours until completely cold, stirring occasionally.

After it is completely cooled, stir in the 2 cups heavy cream and the vanilla until nicely blended. Then pour into your ice cream maker and freeze according to directions.

Pound Cake with Raspberry Sauce

I’d never actually made a pound cake from scratch before so I looked around online for a few likely recipe candidates – finally settling on a few from allrecipes.com, and adding my own little tweaks. This isn’t a loaf pound cake, but a tube pan pound cake – MUCH bigger. And taller. And excellently dense, of course. I’m also glad I had the foresight to pull out our extra huge bowl to mix this in too – not surprising though, once you see the ingredients list! (Sorry – forgot to take an in-progress photo of the bowl of batter and beaters, etc.)

The batter was so thick that when I was putting the batter into the pan, it was much less of a ‘pour’ and more of a ‘scoop and drop’, but it worked out fine, as you can see:

Pound Cake baked in tube pan, out of the oven for a few minutes.

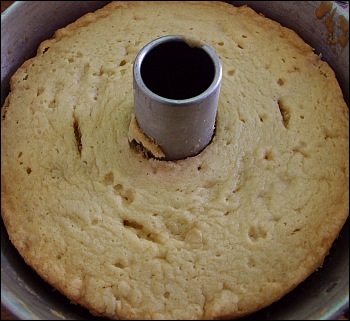
The cake came out really tall too, although that’s hard to see in the photo.

While the cake was cooling, I made an easy raspberry sauce – nicely raspberry-ish, but not overly sweet:

raspberry sauce, cooking on the stove

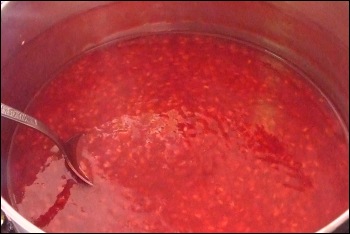
After the sauce was done I put it through a small strainer to take most of the seeds out so it was very smooth.

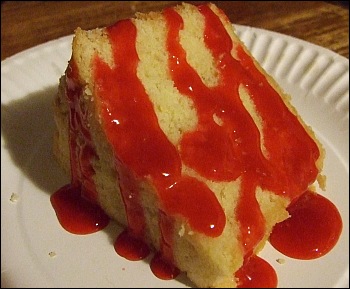
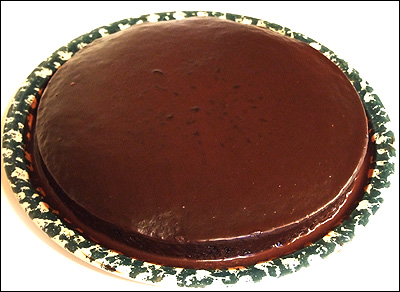
And the serving suggestion – slice a nice hunk of that cake and drizzle the raspberry sauce over it just before serving – yum! Would probably also be good with a dark chocolate drizzle or the like. Take a small slice unless you’re REALLY hungry – as with most pound cakes, this is very dense and filling.

Pound Cake with Raspberry Sauce

Pound Cake with Raspberry Sauce

2 cups butter, softened
2 3/4 cups white sugar
6 eggs
3 3/4 cups flour (use cake flour for a less dense cake)
1/8 teaspoon salt
1/4 teaspoon nutmeg
1/2 cup milk
1 tsp. lemon extract

Grease and flour a tube cake or bundt cake pan.

Sift together flour, salt, and nutmeg in large bowl. Set aside.

Beat butter until soft and creamy. Gradually add 2 3/4 cup sugar, beating as you go, 5-7 minutes.

Add eggs, one at a time, beating just until the yellow of the yoke disappears.

Add flour mix alternately with milk, beginning and ending with the flour. (Mix on low speed, just until blended.)

Stir in the lemon extract.

Pour batter into pan, smooth out the surface. Bake at 325 degrees for 1 hour and 15 minutes, until a toothpick comes out clean.

Raspberry Sauce

1 pint raspberries
1/4 cup sugar
2 tablespoons orange juice
2 tablespoons corn starch
1 cup cold water

Put raspberries, sugar, and orange juice in a saucepan. Whisk corn starch in water, then add to ingredients in the sauce pan. Bring to a boil.

Simmer five minutes, stirring constantly, until desired consistency and thickness. (Sauce will thicken a bit more as it cools.)

If you want, you can also pour the sauce through a strainer to remove the seeds and make a smooth sauce.

Drizzle over slices of pound cake just before serving.

Cherry Cookies

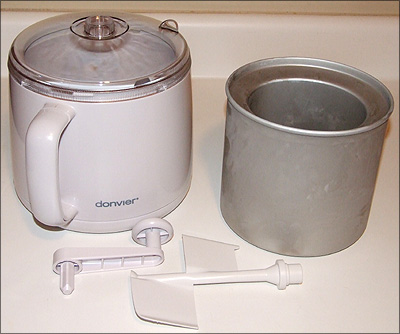
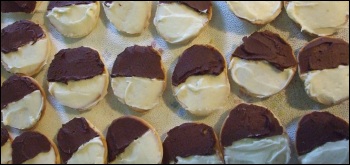
It’s holiday time, so I’m starting to pull out recipes I usually only make this time of year. (For no other reason except that it’s nice to have some recipes for special occasions.) I started with Cherry Cookies, since I haven’t made those in a LONG time, and they look so darn festive – covered in chopped walnuts with a cherry in the center!

See? Festive!

Cherry Cookies

2 cups flour
1 tsp. baking powder
1/4 tsp. salt
1 cup butter or margarine (softened)
3/4 cup sugar
2 egg yolks, beaten
1 tsp. vanilla
2 cups finely chopped walnuts or pecans
2 unbeaten egg whites
cherry halves
In small bowl combine flour, baking powder, and salt.

In large mixer bowl beat margarine and sugar until light and fluffy. Add egg yolks, dry ingredients and vanilla. Mix well. Chill dough 30 minutes. Preheat oven to 375 degrees.

Grease 2 large cookie sheets. Place chopped nuts in one small bowl and egg whites in another. Roll dough by the teaspoonful into balls, flatten slightly, dip in egg whites, then roll in nuts. Place on cookie sheets. Press cherry half into center of each cookie. Bake 12 minutes. Cool on wire racks. Makes about 54.

Jam & Cheese Loaf Recipe

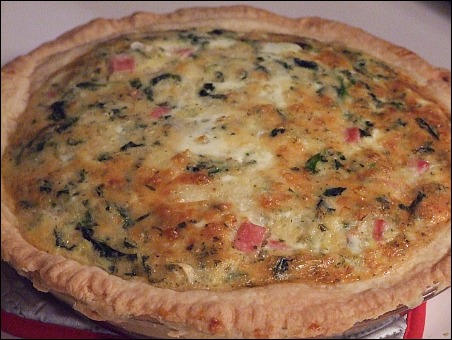
For some reason I had a little extra time on the day before Thanksgiving, so I decided to make a Jam & Cheese Loaf for breakfast the next day. It’s essentially a biscuit base, cream cheese filling, topped with the jam of your choice. Really easy and really tasty, and it looks pretty neat too, since you braid the dough over the filling:

I basically halfed this recipe since the full recipe makes a pretty large loaf. We finished it off in no time.

Jam and Cheese Loaf

1 package hyperactive, dry yeast
1/2 cup warm water (110-115 degrees)
2 1/2 cups packaged biscuit mix
1 beaten egg
1 tablespoon sugar
1 8-ounce package cream cheese, softened
1/2 cup sugar
1 tablespoon lemon juice
1/4 cup desired jam or preserves

In a mixing bowl, dissolve yeast in water. Stir in biscuit mix, egg, and one tablespoon sugar. Turn out onto surface dusted with additional biscuit mix. Knead gently 20 strokes. Place dough on a greased 15 1/2 x 12 inch baking sheet. Pat into a 14 x 9 inch rectangle.

For filling, stir together cream cheese, the 1/2 cup sugar, and lemon juice until smooth. Spread lengthwise down center third of rectangle. Make 3 inch cuts in dough at 1 inch intervals on both sides of filling. Fold strips alternately over filling. Cover. Chill Overnight. Bake in a 350 degree oven for 20 minutes. Spoon desired jam down center of loaf. Bake 5 minutes more or until golden brown. Cool 10 minutes. Makes 1 loaf.

Homemade Hot Cocoa Mix

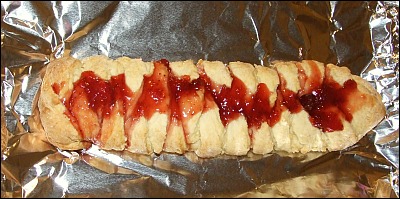
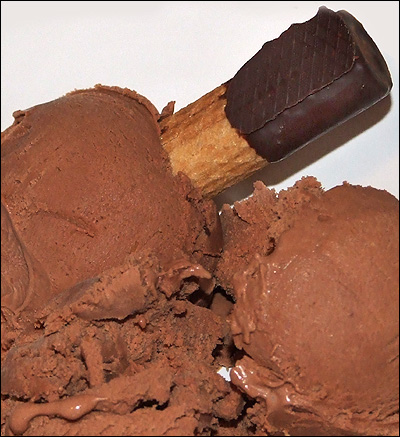
I picked up the complimentary ‘Something Extra’ magazine from our local Nob Hill Foods supermarket the other day. While I was wandering through the pages, my attention caught on the recipe for homemade hot chocolate mix. I was excited because over the last year we’d been looking at the ingredients in all the standard single serving packets of hot chocolate on the market, and it seems that (excluding the more expensive or gourmet brands) there was a lot of unnecessary ingredients in them, including sucralose, which tends to give us both slight headaches. The one with the fewest ingredients was Swiss Miss (sans marshmallows), so we’d been using that.

Anyway, the recipe was pretty good, but we felt it needed a touch more sugar, so here’s our tweaked version of their recipe:

Homemade Hot Cocoa Mix

3 cups instant dry milk
1 1/2 to 2 cups sugar (to taste)
1 cup unsweetened cocoa powder
1 tbsp. cornstarch
1 tbsp. cinnamon (optional)

Just mix all of the ingredients together in a sealable plastic ziplock bag and store it in a container with a tight fitting lid. To make a cup of hot chocolate, add 1/3 cup of the mixture to a mug with 8 oz. steaming hot water and stir well. (Makes about 15 mugs.)

We’re very happy with the way it came out!

Mini Apple Pies

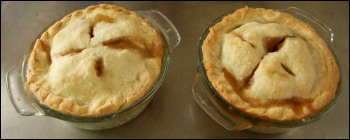
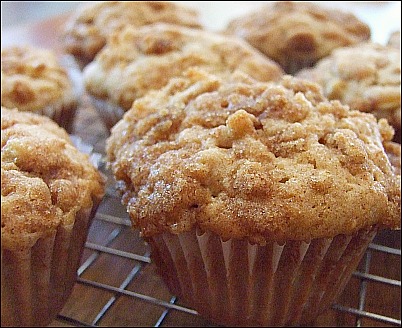
A long time ago we’d found these terrific little individual serving glass pyrex dishes at the Dollar Store of all places, and the other day I got to use them for the first time when making a couple of mini apple pies! (I would have made a regular pie, but we only had three apples in the fridge – besides – what a good ready-made excuse to use the darn things.)

I cut our apple pie recipe (below) in half, and also cut our pie crust recipe (below) in half. I also have to admit that this is the first time I’ve actually made a pie crust from scratch! John’s made them from scratch, but I’ve grabbed the pre-made crusts in the past. But after doing this and seeing how easy it is, I’ll probably hardly EVER use the pre-made crusts again.

The final pies came out really cute, and just like a regular apple pie, although the ‘individual’ portions were pretty big, but we got over it.

One more point: as you can see in the photo, I sealed the edges of the pie like normal, but tucked the edges back in the glass pan a bit since I didn’t want them to get dried out or burned. Wallah!

Here are the recipes I adapted…

Apple Pie

6 cups thinly sliced apples (Granny Smith, MacIntosh do well)
3/4 cup sugar
2 tablespoons flour
3/4 teaspoon cinnamon
1/4 teaspoon salt
1/8 teaspoon nutmeg
1 tablespoon lemon juice
1 package Pillsbury pie crusts (2 crusts)
or use a homemade double crust recipe

Bring crust to room temperature. Unfold crust and press out fold lines with fingers. If crust cracks, wet fingers and push edges of crack together to seal. Place crust in ungreased 9-inch pan, glass recommended. Press crust firmly against sides and bottom. Trim crust along pan edge. (Or follow homemade crust recipe)

Heat oven to 425 degrees. In large bowl, combine all filling ingredients; mix lightly. Fill pie crust. Place second crust over filling. Wrap excess top crust under bottom crust edge. Press edges together to seal – flute. Cut slits in top crust.

Bake at 425 degrees for 40-45 minutes or until apples are tender and crust is golden brown.

Note: Slice the apple pieces really thin to make sure they can be cooked through completely during baking. Also, when cutting up the apples, don’t get TOO close to the core. You want to cut off any section that has any core ‘string’ type stuff on it because that won’t get soft while cooking and can be annoying to bite into. Also, if you use Granny Smith apples you get more tartness than MacIntosh, FYI.

Pie Crust

1 cup Crisco (or butter)
2 and 1/4 cups flour
1 teaspoon salt
3/4 cup ice water.

Mix Crisco, flour and salt with a fork until crumbly.

Add 1/2 cup of water to flour mixture and mix with a fork.
Add remaining water until mixture is moistened – you
probably won’t have to add ALL of the leftover water.
Roll out 1/2 of the dough on a board covered with flour.
Use enough flour to make it roll easily.

This makes top and bottom for a 9-inch pie.